|
How can I easily fill out the DRIVER EXCHANGE report?
|
Below is an example of how to quickly fill out the DRIVER EXCHANGE report for
a two motor vehicle in transport crash. Motor vehicle # 1 has one person in it,
the driver, while motor vehicle # 2 has two people in it: the driver and
a passenger.
-
First click on the
 button
as soon as you open a new crash form. button
as soon as you open a new crash form.
-
TraCS will take you directly to the TOTAL MOTORIZED UNITS field.
Enter 2 in this field.

-
Press the Tab key or the Next button.
-
Wait for TraCS to add the two motor vehicles.
-
TraCS will take you directly to the first motor vehicle's VIN field.
-
Scan all the registrations available and select the first vehicle scanned or,
if the registration is not available to scan, click on the
Edit/New button to enter the VIN number manually.

-
Press the Tab key or the Next button to go to the BODY TYPE field.
-
If the BODY TYPE is not populated automatically from the scanned registration
then:
-
Click on the Search button
-
Search the needed body type
-
Select the needed body type
-
Click on the Done button to close the search window
-
Click the Tab key or the Next button to move to the MOTOR VEHICLE TYPE field.
-
Select the "Motor Vehicle In-Transport (Inside or Outside the Trafficway)" option.

-
Press the Tab key or the Next button to move to the TOTAL PEOPLE IN VEHICLE field.
-
Enter 1 in this field to reflect the driver of this motor vehicle:

-
Press the Tab key or the Next button.
-
Wait for TraCS to add the one Person to the form.
-
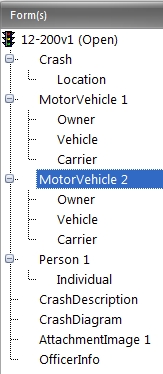
Click on the second motor vehicle in the Form(s) section:

-
TraCS will take you to the second motor vehicle on the form.
-
Select the second vehicle scanned or, if the registration was not
available to scan, click on the Edit/New button to enter the
VIN number for the second vehicle manually.

-
Press the Tab key or the Next button to go to the BODY TYPE field.
-
If the BODY TYPE is not populated automatically from the scanned registration
then:
-
Click on the Search button
-
Search the needed body type
-
Select the needed body type
-
Click on the Done button to close the search window
-
Click the Tab key or the Next button to move to the MOTOR VEHICLE TYPE field.
-
Select the "Motor Vehicle In-Transport (Inside or Outside the Trafficway)" option.

-
Press the Tab key or the Next button to move to the TOTAL PEOPLE IN VEHICLE field.
-
Press the Tab key or the Next button.
-
Enter 2 in this field to reflect the driver and the one passenger of
this motor vehicle:

-
Press the Tab key or the Next button.
-
Wait for TraCS to add the two Persons to the form.
-
Click on the first person in the Form(s) section:

-
TraCS will take you to the PERSON TYPE field for this person. Note that
the VEHICLE # is already set to 1 since this is the first person we added
to the form and it belongs to motor vehicle # 1.
-
In the PERSON TYPE field select "Driver of a Motor Vehicle in Transport" to
indicate that this is the driver of the motor vehicle # 1:

-
Click on the second person in the Form(s) section:

-
TraCS will take you to the PERSON TYPE field for this person. Note that
the VEHICLE # is already set to 2 since this is one of the two persons
we added to motor vehicle # 2.
-
In the PERSON TYPE field select "Driver of a Motor Vehicle in Transport" to
indicate that this is the driver of motor vehicle # 2:

-
Click on the third person in the Form(s) section:

-
TraCS will take you to the PERSON TYPE field for this person. Note that
the VEHICLE # is already set to 2 since this is one of the two persons
we added to motor vehicle # 2.
-
In the PERSON TYPE field select "Passenger of a Motor Vehicle in Transport"
to indicate that this is the passenger of motor vehicle # 2:

-
Next, click on the Validate button and work through the remaining enabled
fields. Note that the error messages in the Validation pane will dissapear
as you fill out the fields.
-
Once all the errors are gone from the Validation pane, click on the Validate
button once more to make sure that no other fields became required as a
result of the values entered and, if no other errors are displayed, the
Driver Exchange part of the report is complete.
-
You can now print your completed Driver Exchange report.
-
Click on the
 button once
again to take the form out of Driver Exchange mode and enable the other
fields in order to complete your report. button once
again to take the form out of Driver Exchange mode and enable the other
fields in order to complete your report.
|
|
|
 button
as soon as you open a new crash form.


 button once
again to take the form out of Driver Exchange mode and enable the other
fields in order to complete your report.